Connecting NetSuite to external software demands careful configuration and proper authentication credentials. This step-by-step guide will take you through activating key features, establishing an integration role, and obtaining your Client ID and Client Secret for secure access.
Overview
To set up NetSuite API access, you'll need to complete three main tasks:
- Enable the required company features in your NetSuite environment
- Create an integration role and assign it to your employee record
- Create an integration record to generate your Client ID and Client Secret
Let's walk through each step in detail.
Enable required features
Step 1: Log into your NetSuite portal
Access your NetSuite account with administrator credentials.
Step 2: Navigate to company features
Go to Setup > Company > Enable Features.
Step 3: Enable SuiteCloud features
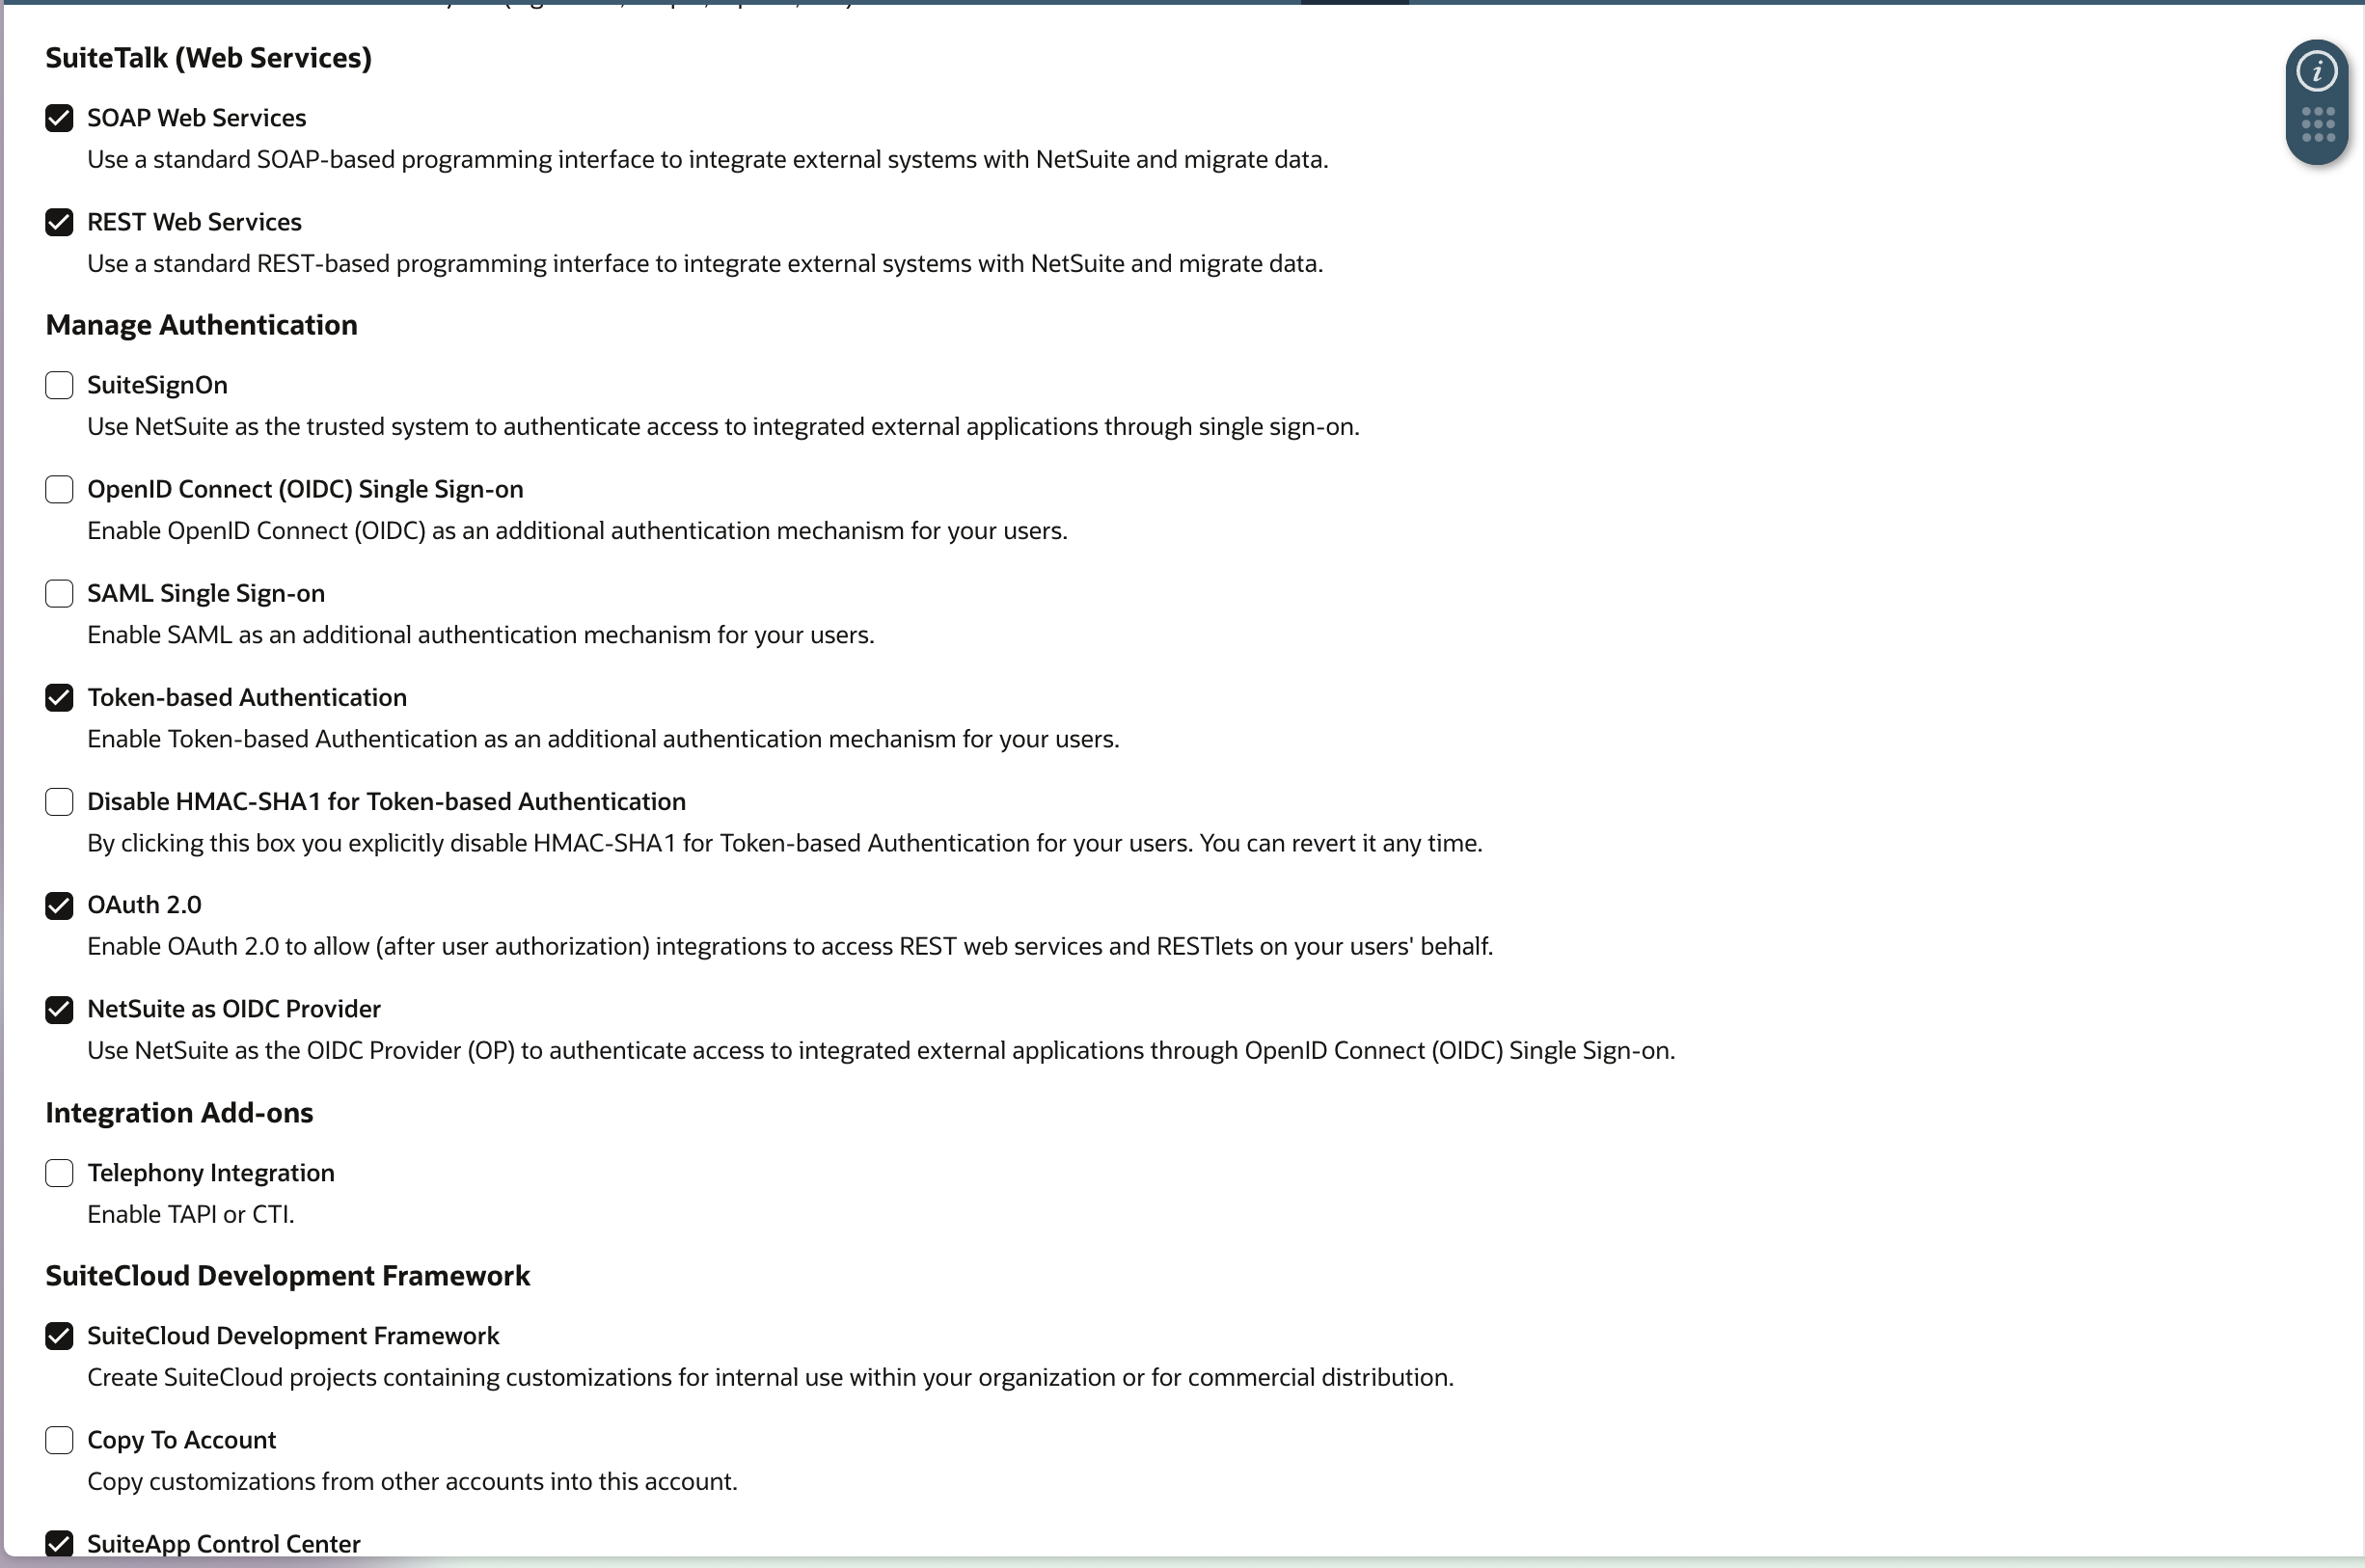
Under the SuiteCloud tab, enable the following features:
- SuiteTalk (Web Services)
- REST Web Services
- Manage Authentication
- Token-based Authentication
- OAuth 2.0
- NetSuite as OIDC Provider
Make sure all these options are checked and save your changes.
Create an integration role
Step 4: Access role management
Navigate to Setup > Users/Roles > Manage Roles and click New.
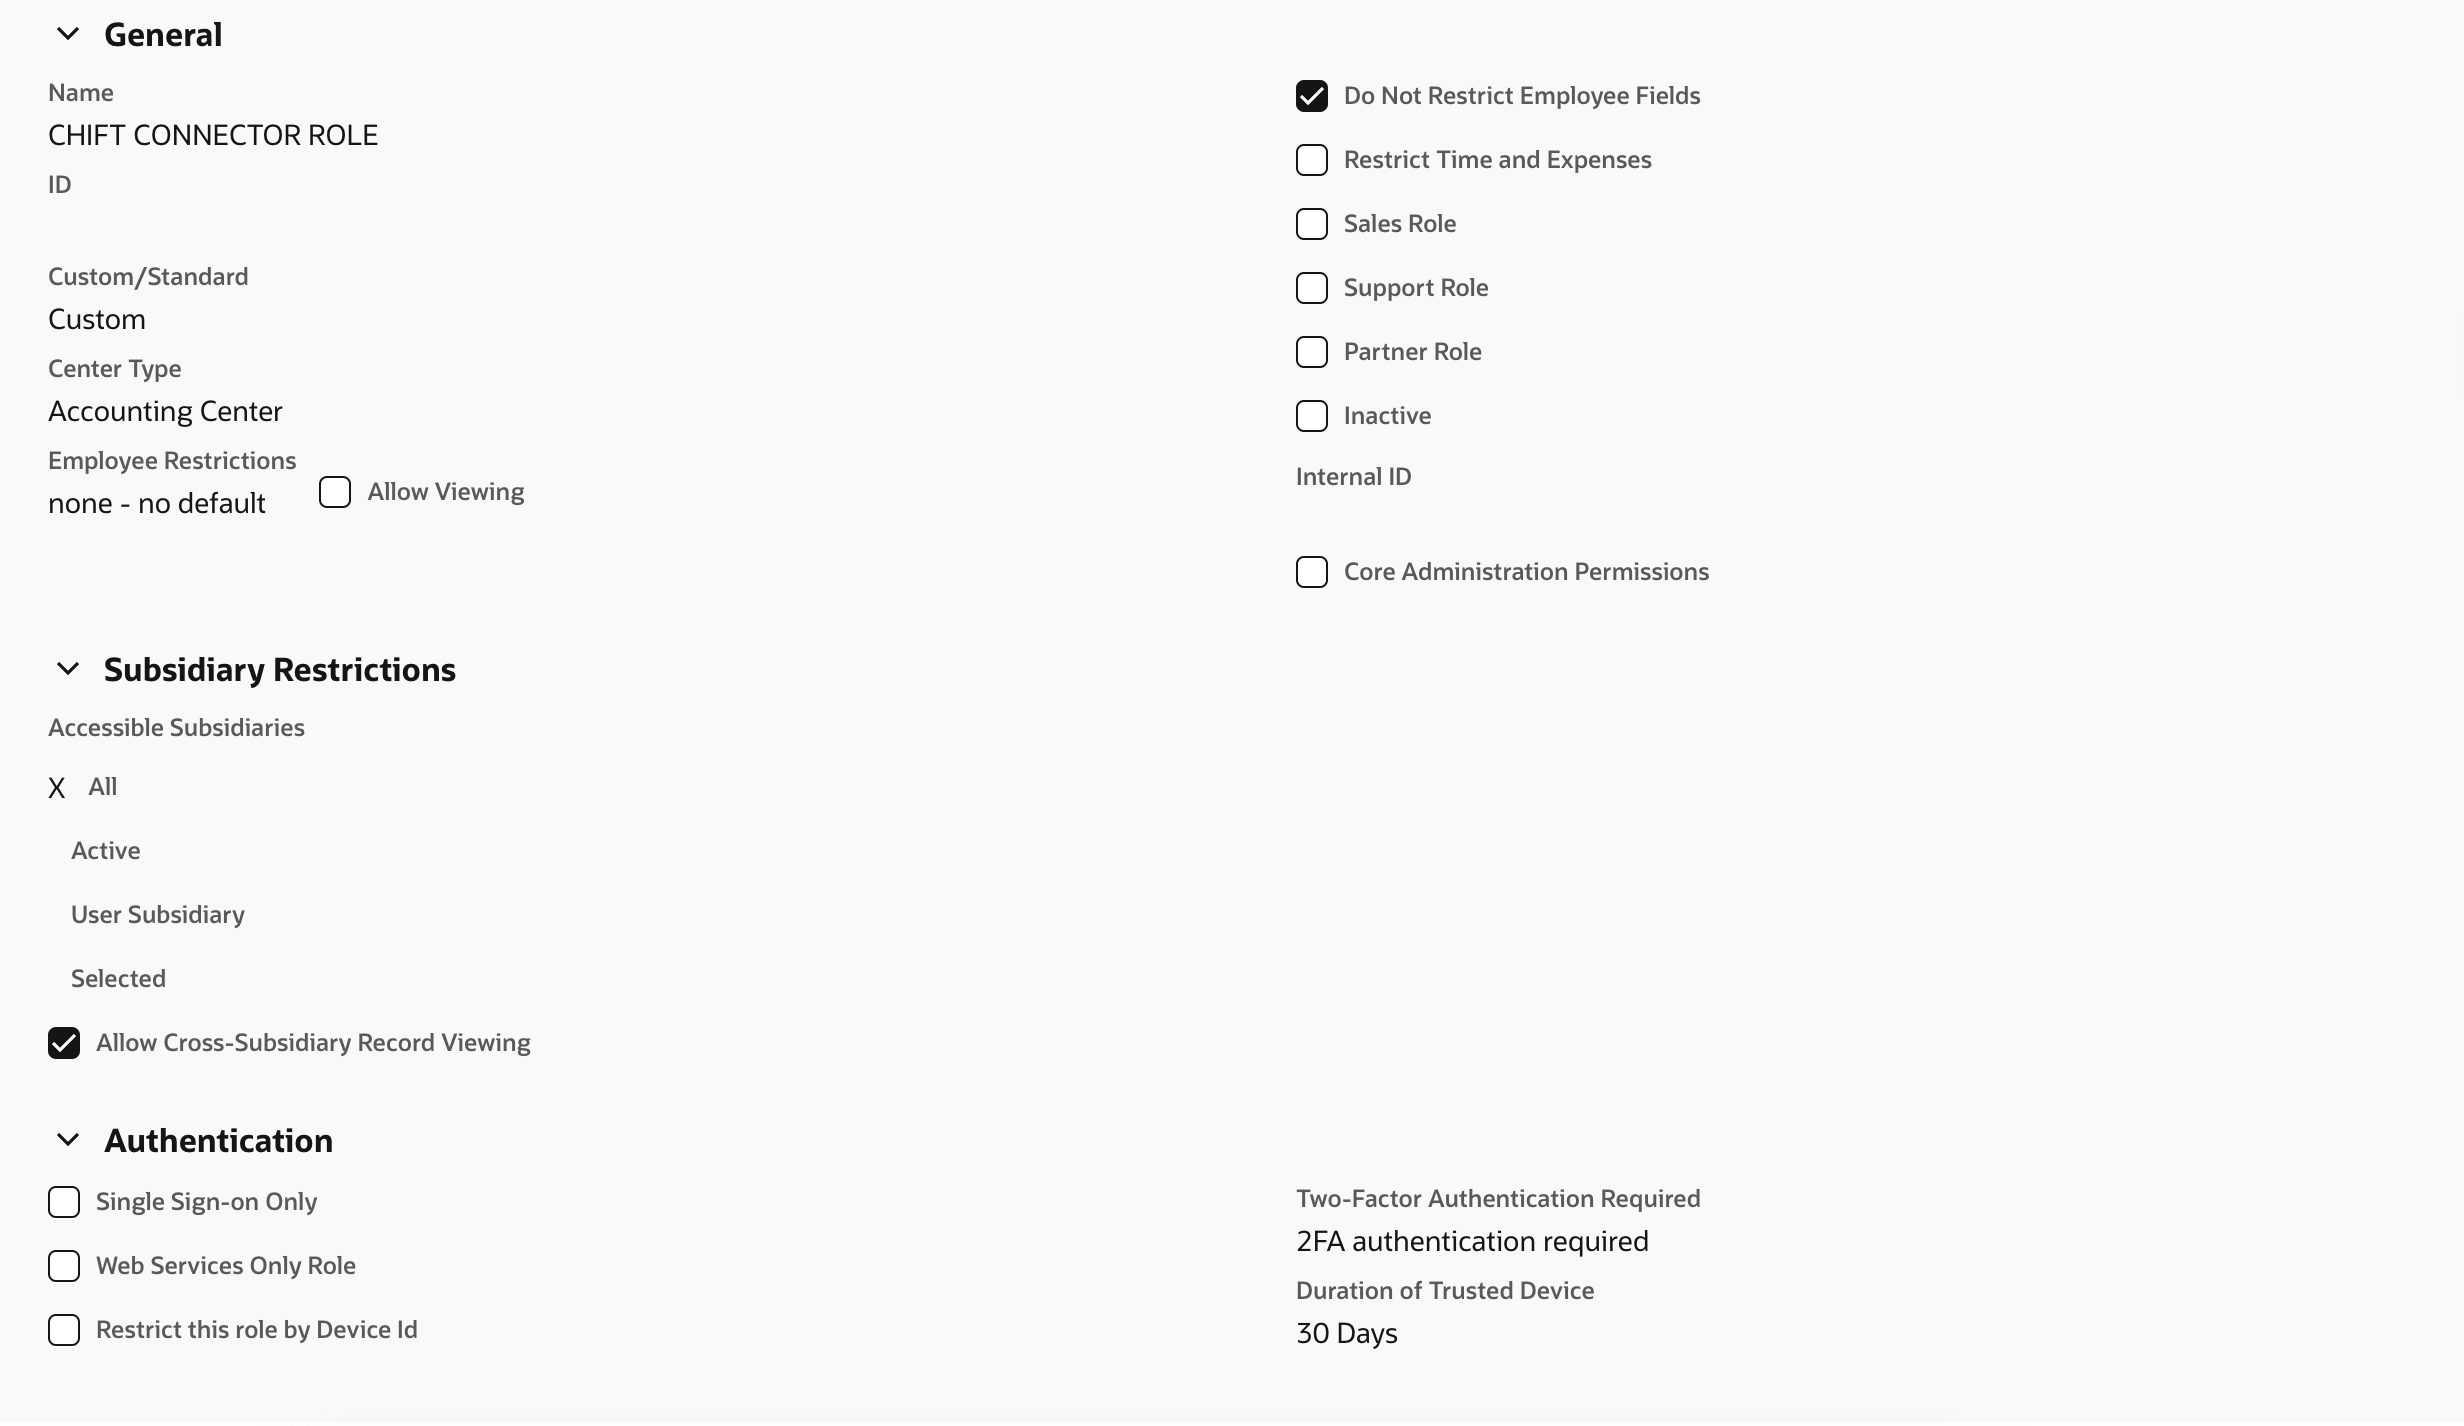
Step 5: Configure role permissions
Set up permissions for the following categories according to your integration needs:
- Permissions > Transactions
- Permissions > Reports
- Permissions > Lists
- Permissions > Setup
- Permissions > Custom Records
Assign the appropriate permission levels (View, Create, Edit, Delete) based on what your integration requires.
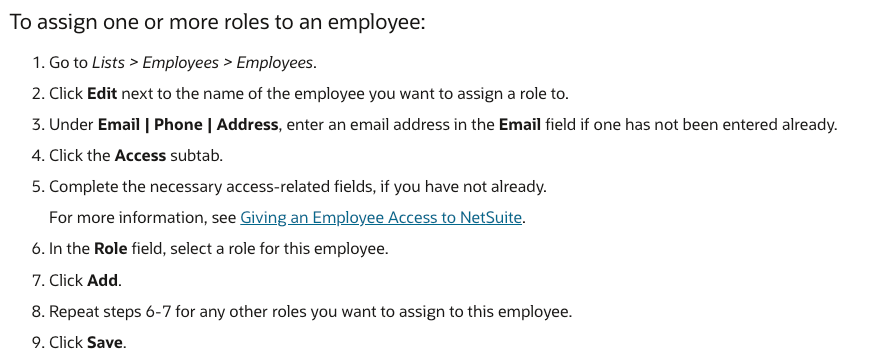
Step 6: Assign the role to your employee record
Once the role is created, assign it to your employee record (representing yourself or the API user) to enable the connection with your account.
For more details on role configuration, refer to Oracle's official documentation.
Create integration record and generate API credentials
Step 7: Navigate to integration management
Go to Setup > Integration > Manage Integration and click New.
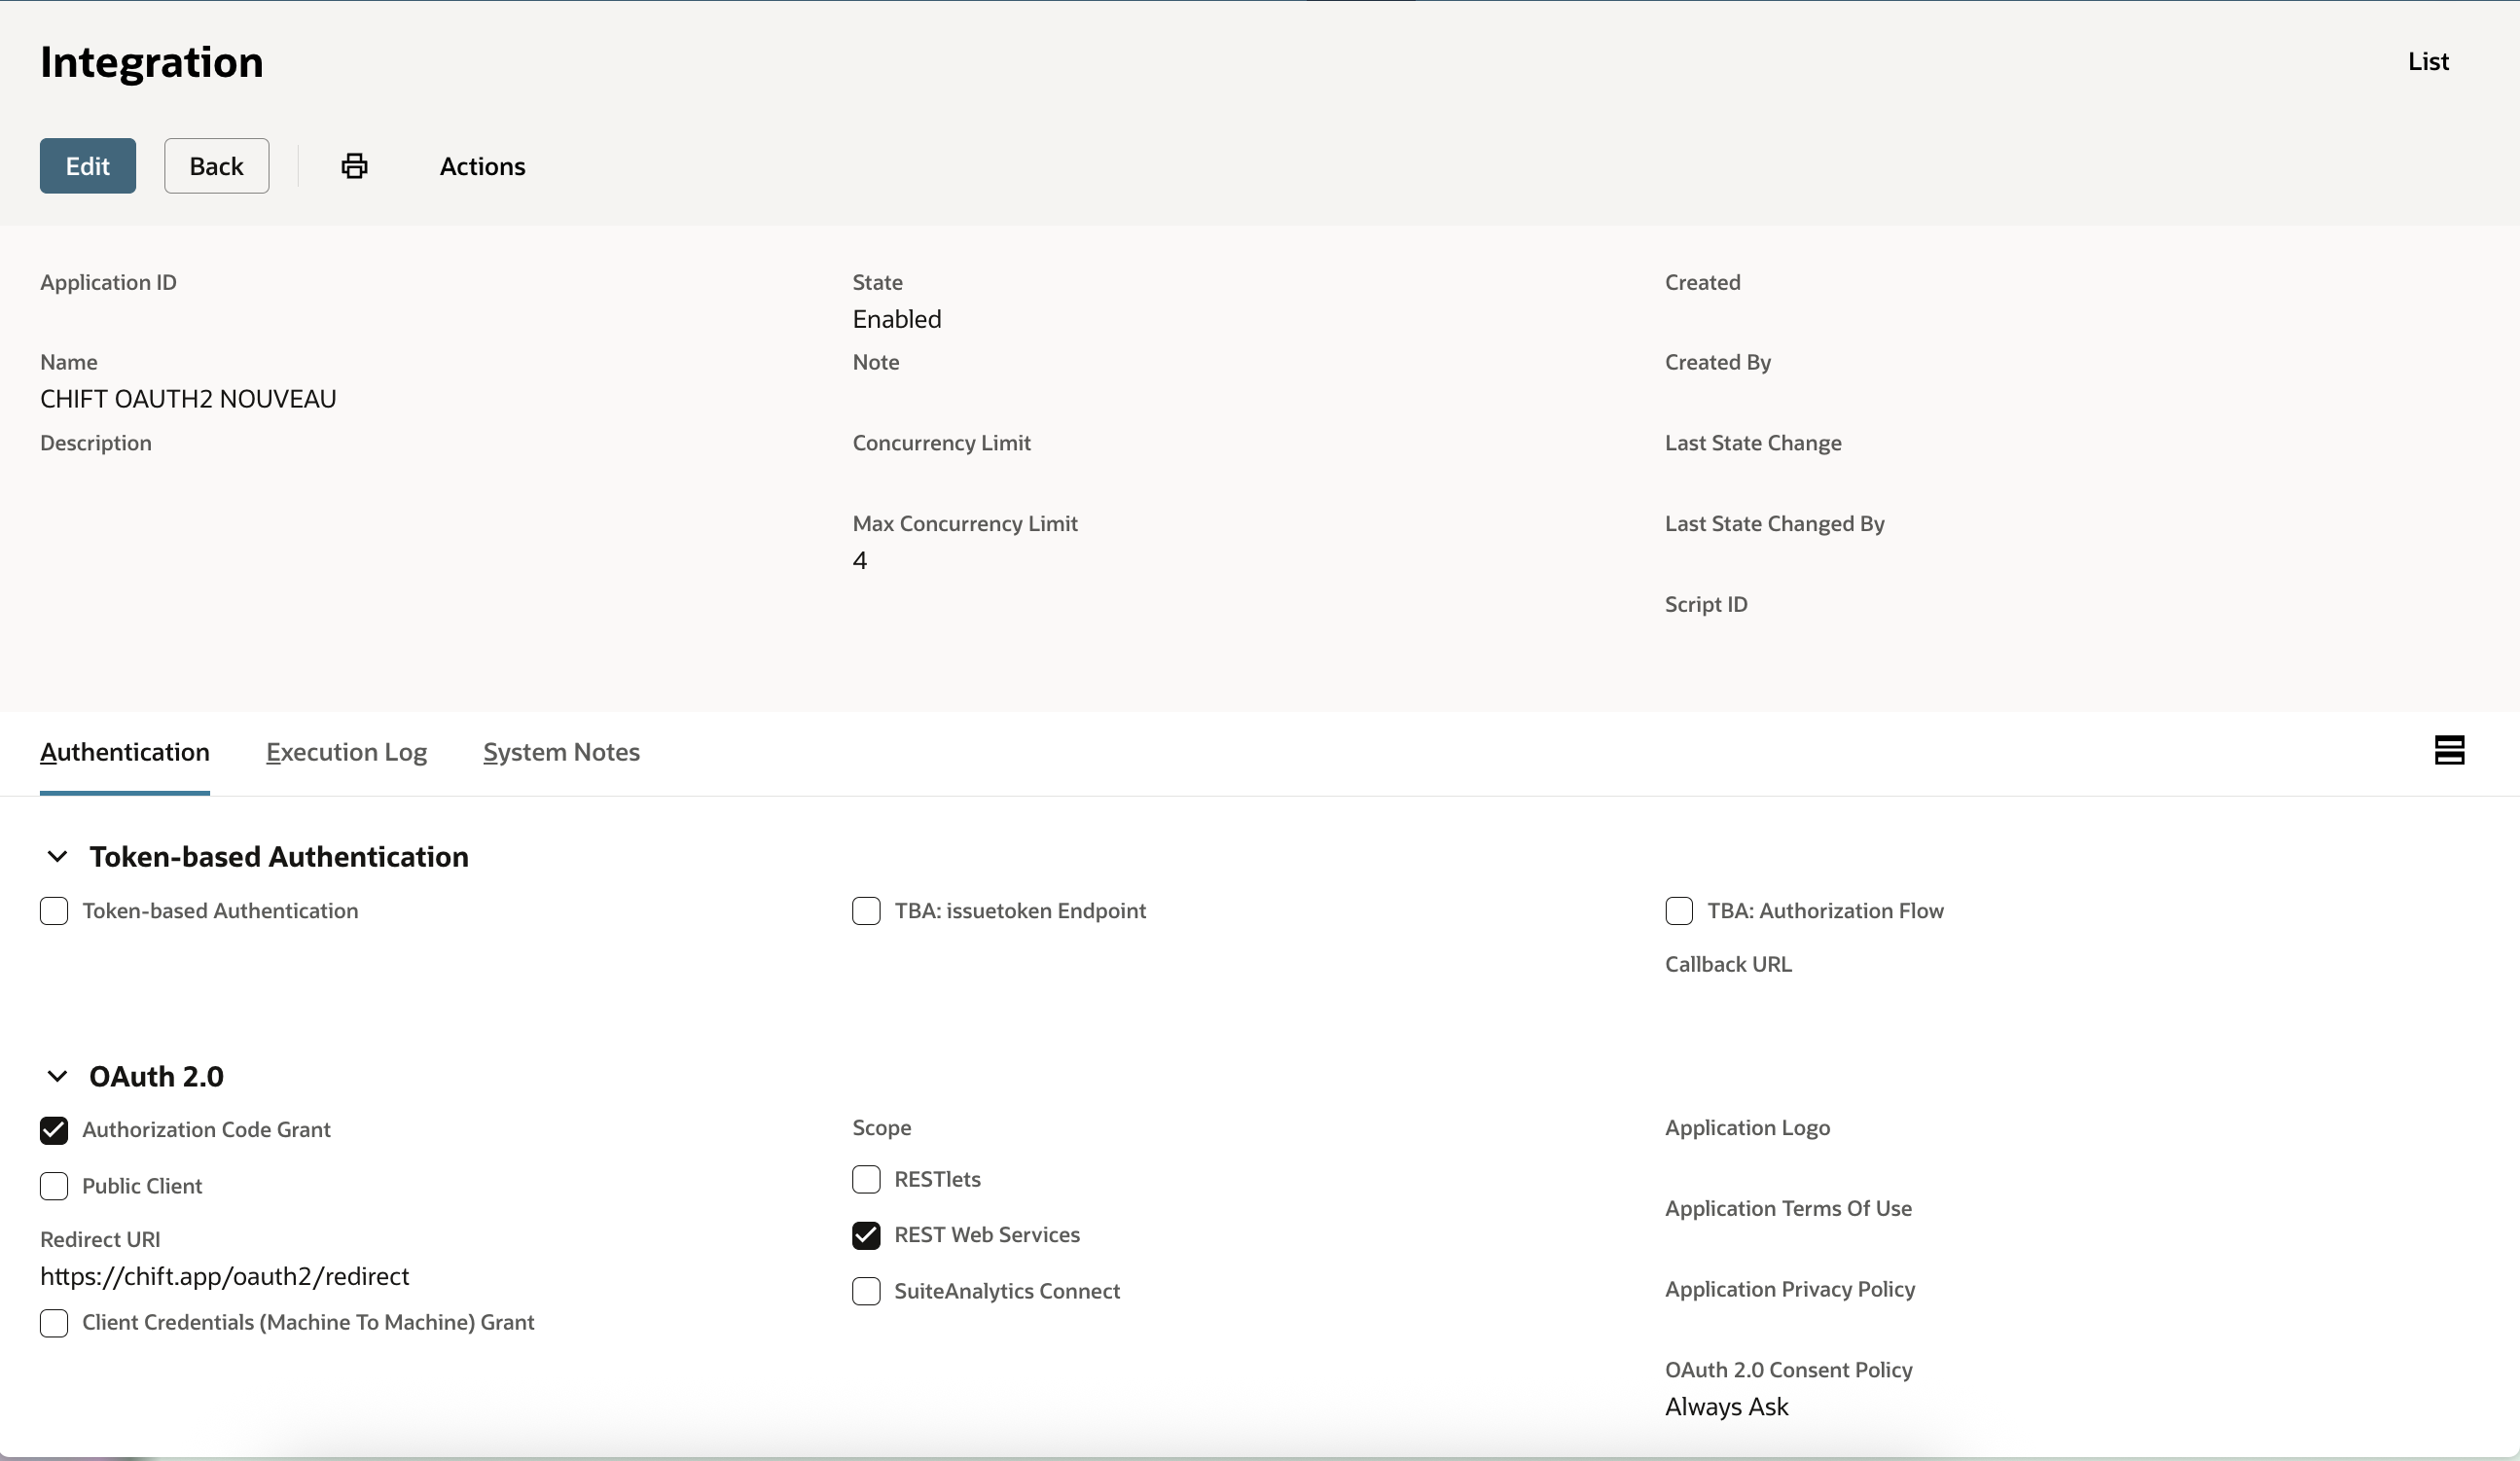
Step 8: Create your integration record
Enter a descriptive name for your integration and configure the authentication setup as needed.
Step 9: Save and copy your credentials
When you create this integration, NetSuite will generate a Client ID and Client Secret once only.
Important: Copy and securely store both credentials immediately. They will not be shown again and cannot be retrieved later. If you lose them, you'll need to regenerate new credentials by editing and saving the integration record.
Curious about how you can use Chift’s Unified Accounting API for your integrations? Reach out to our team for a demo.


.jpg)
.jpg)
.jpg)
.jpg)

.jpg)
.webp)
.webp)

.jpg)
.jpg)


.webp)

.jpg)
.webp)


.avif)


